Why do I live my Cricut Maker? Let me count the projects I’ve created 1, 2, 3… Nope, I can’t count them all, it’s too many! Every time I make a new project, I find a new reason to love my Cricut. It’s my go-to tool for crafting projects big and small. While I can’t count all of the projects I’ve made, I can share with you my top 5 reasons I love my Cricut Maker along with my newest project, DIY clean / dirty mask bags.
This is a sponsored post.
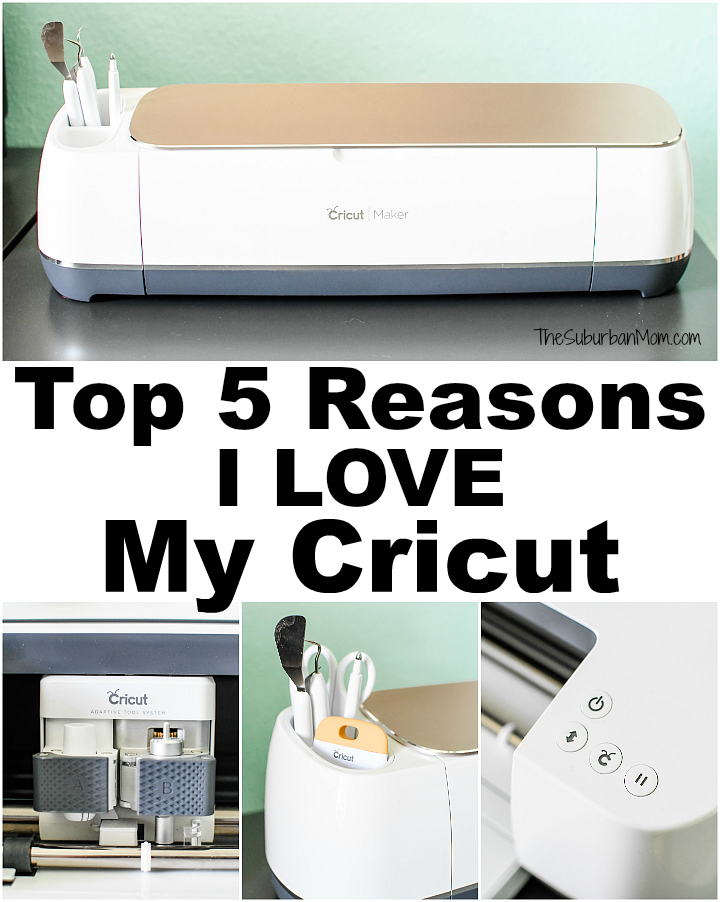
5 Reasons I Love My Cricut Maker
When I bought my first Cricut, more than 10 years ago, I bought it primarily to make cards, birthday invitations and birthday party decorations out of paper. Since that first machine, I have made all that and a whole lot more. Vinyl wasn’t even on my radar when I bought my first machine, but it quickly became my favorite material to work with. I’ve used temporary vinyl to create wall decals for parties, iron-on to make shirts and permanent to make gifts. The list goes on and on.
I love to create, and owning a Cricut opened up a whole new world of creativity for me. From inspiration found online to things I dream up, I love having the tools and confidence to create anything. The one downside to the ability to create anything is the ability to get overwhelmed. The key to overcoming that is to keep it simple, what do I want to create today? Something seasonal? Something practical? Start with one project, and when that one is successful explore something new.
Customize Anything, Quickly And Easily
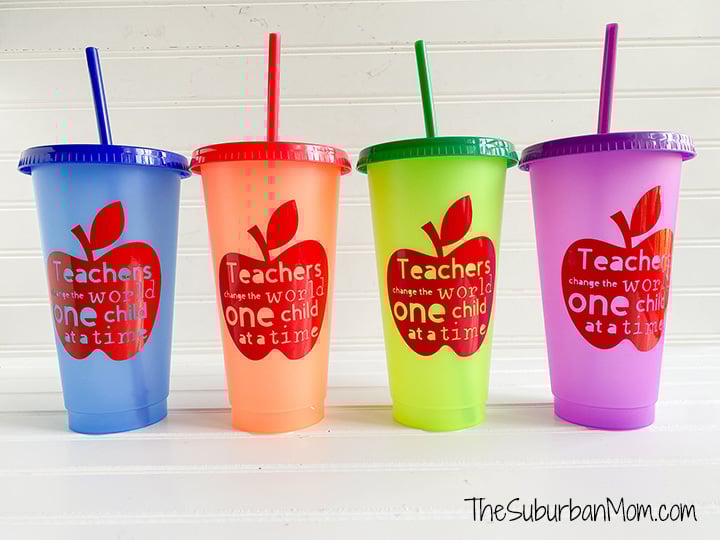
One of the things I love most about owning a Cricut machine is the ability to quickly and easily customize just about anything. This week alone, I added vinyl decals to color-changing cups as last-minute teacher gifts, personalized my daughter’s new homeschool desk, added decals to personalize notebooks and folders and made clean/dirty mask bags.
I keep my Cricut set up on a rolling cart with supplies ready to use whenever inspiration strikes. While some projects are very involved and take time to design and create, I’ve also been known to throw together an idea in a matter of minutes. In fact, I decided to make color-changing cups at 4 pm the day before I needed them, by 4:30 they were done from design to final product. The next day, I whipped out four more for my other daughter’s teachers.
Access To Fonts, Images And Projects In Design Space
Design Space is Cricut’s user-friendly design platform. The best part is that you don’t have to have any design experience to use it. With access to more than 100,000 images, more than 400 fonts and pre-designed projects, you can quickly and easily find elements to create your design. You don’t have to worry about if your Cricut can cut it, you don’t have to use any special programs, and you don’t have to worry about owning the rights – everything in Design Space is ready to go.
Every Cricut comes with a 30-trial of Design Access, and I suggest every new Cricut owner to take advantage of that. While I love the ability to import my own designs into Cricut and cut them, not everyone knows how to design in other programs so Design Space gives you the ability to design with full rights to use the items you find in Design Space. There are a few premium elements that you have to pay extra for, things like Disney licensed characters, but most of the elements are included. (I used premium files for my DIY Frozen shirt.)
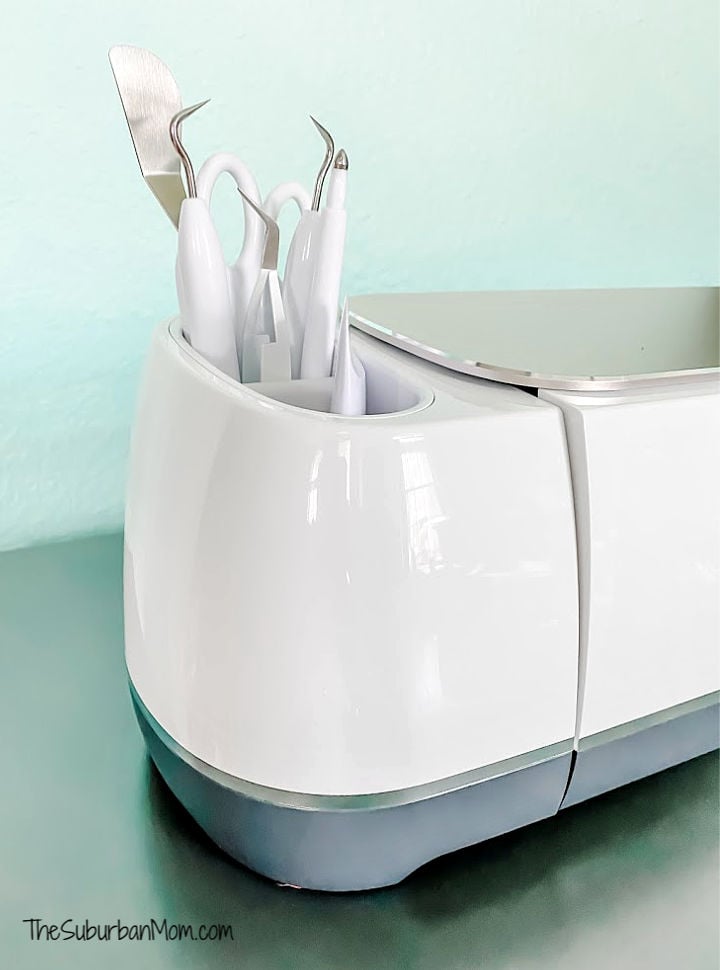
Tools For Everything
While I am an advocate of not rushing out and buying all of the tools and accessories at once, the more I use my Cricut the more I find new tools that I want to get. I haven’t gotten a tool that I don’t love, they are all just so handy. From the basic accessories like the weeding tool to the EasyPress Mini (my newest toy!), Cricut has a tool for every need. Cricut also has fantastic materials and blanks like the ones used in my mask bag project below.
Want to know more about my favorite tools, check out this post So You Got A Cricut, Now What?
Cut ALL The Things With Cricut Maker
There are two Cricut machines, the Cricut Air and the Cricut Maker. The biggest difference between the machines is that the Cricut Maker has the ability to cut more materials with more advanced blades. For example, with the Cricut Maker you can cut fabric with a rotary blade and balsa wood with a knife blade! I haven’t tried cutting wood yet, although it is on my list, but I have cut fabric for masks using my Cricut Maker. For me, it was important to have a machine that could cut all the materials because I never know what inspiration will have me wanting to make this week.
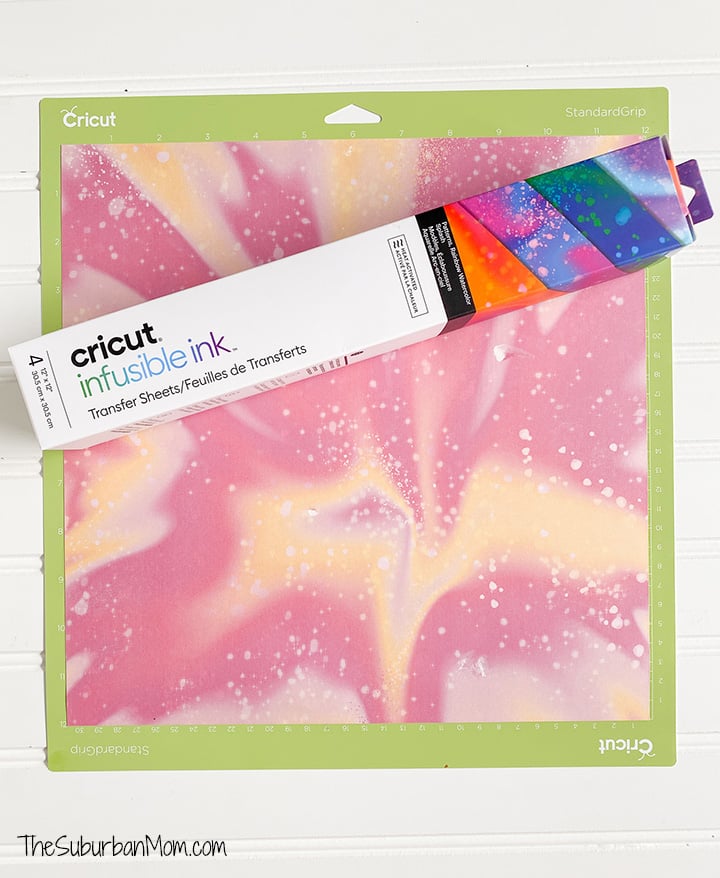
My new favorite material is Infusible Ink transfer sheets, down below you will see a tutorial to create mask bags with Infusible Ink. Both the Cricut Air and the Cricut Maker can cut Infusible Ink, and it creates beautiful projects.
The next material I want to experiment is with acrylic blanks. I want to use the engraving tool to engrave keychains.
Cut From Your Computer, iPad or iPhone
Most of the time, I use my computer with my Cricut because that’s what I am comfortable with, but you can also use an iPad or iPhone with Cricut machines. The one time I used my phone was to take advantage of SnapMat, which allowed me to layout scraps all over my mat to cut a variety of colors with one cut. If you are cutting different colors for one project, it is a must! You can find that tutorial in my Ice Cream Shop craft.

I could go on because I really do love this machine and use it all of the time, but you get the point. If you love to create and want to expand your ability to create all kinds of things add Cricut Maker to your wish list. Then spend time playing with the machine, start small, and soon you will be making more complicated projects that will amaze you.
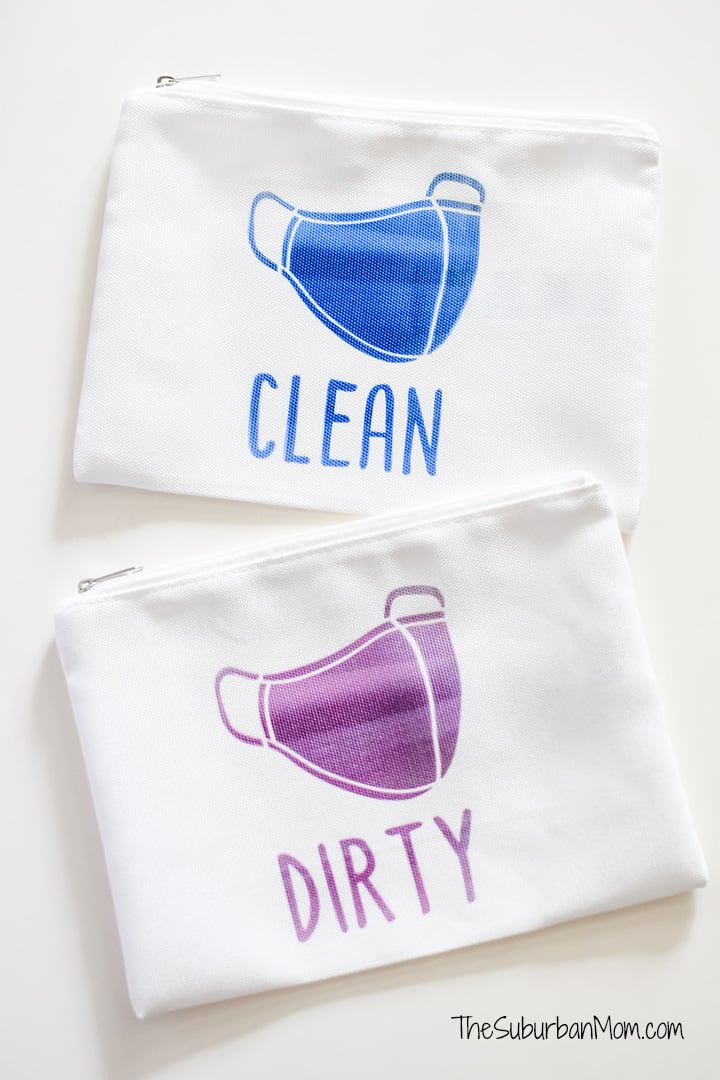
DIY Clean / Dirty Mask Bag Tutorial
I’ve been making masks for months, but it wasn’t until we rented a cabin in Georgia that it dawned on me the need to have clean and dirty mask bags for storage. For the trip, I ended up using plain bags, but when I got home I decided to create something more fun with my Cricut Maker – DIY Clean/Dirty Mask Bags.
Materials
- Cricut cosmetic bags
- Infusible Ink transfer sheets (I used Brushed Sunset)
- Cricut machine (I have a Cricut Maker HERE)
- Standard grip matt
- Regular blade
- EasyPress Mini
Directions
Both the mask icon and the font I used for my clean / dirty mask bags are available in Design Space. You can either recreate the design yourself or you can use my design HERE. The design is sized for Cricut’s 9×6 cosmetic bag, but you can adjust the size as needed.
For my full tutorial on Infusible Ink, check out my Tutu Cute shirt tutorial.
Place the Infusible Ink sheet on your standard grip mat color side up. Don’t forget to mirror your image before you cut!!!
Tuck a piece of thick paper or cardboard inside the bag so that the color doesn’t bleed through.
After weeding the Infusible Ink, prep the cosmetic bag by rolling it with a lint roller and pre-heating the bag for 15 seconds.
Line up the design on your bag and lay a piece of parchment paper (included with Cricut Infusible Ink) on top of the design. Use your EasyPress Mini to press the image at high heat for 75 seconds with constantly moving light pressure. (Find more EasyPress heat settings HERE.)
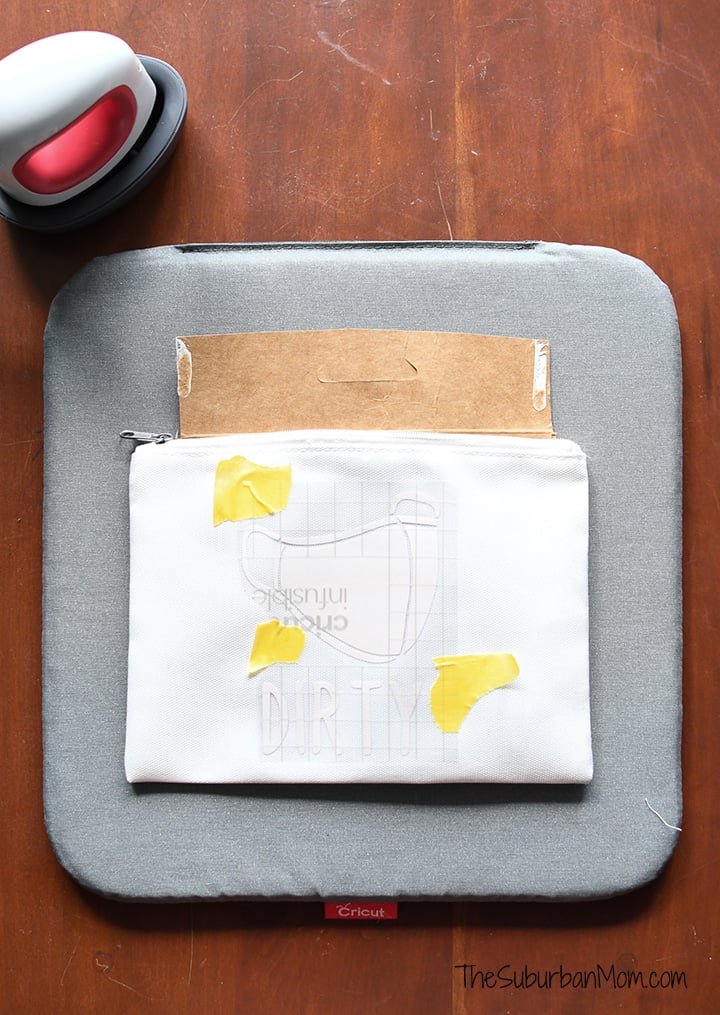
Peel away plastic transfer while warm. The Infusible Ink will remain behind.

Want to make your own masks? Check out my face masks tutorial for 5 ways to make face masks.