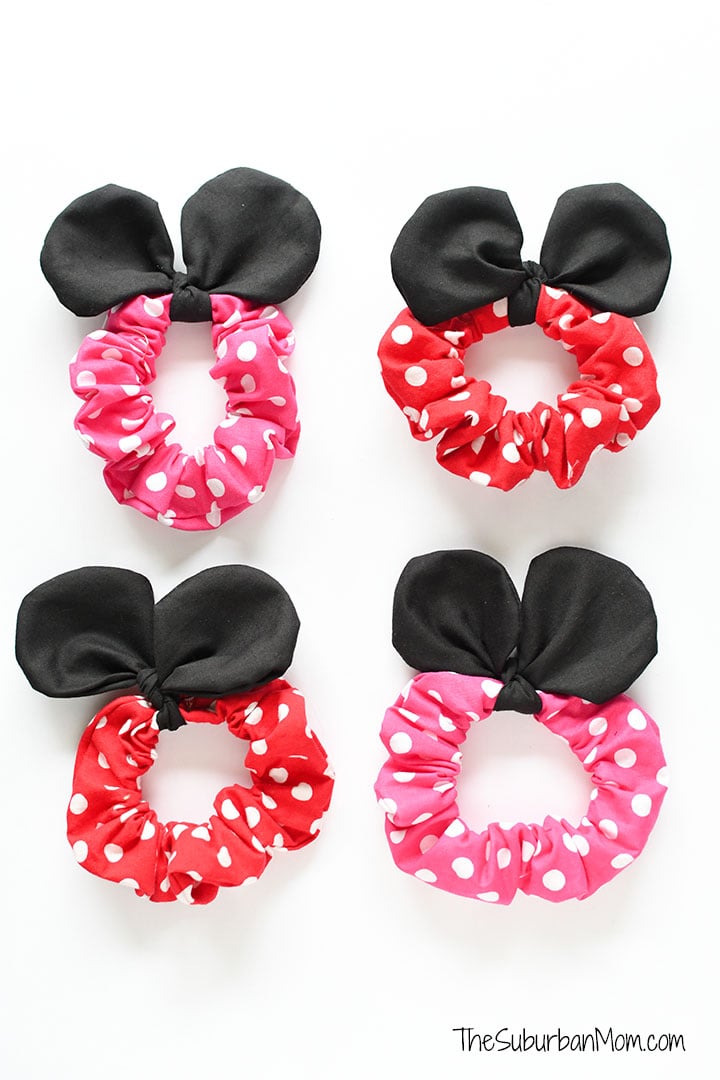
DIY Minnie Mouse scrunchies easy tutorial and free pattern with Cricut Maker. Use your Cricut Maker to cut all of the pieces needed to make these mouse-ear scrunchies. Up your Disney-fashion game with Minnie Mouse hairstyles or wear Minnie Mouse scrunchies on your wrist. Either way, you will rock these mouse ears.
This is a sponsored post.

The last time we went to Disney, our oldest got a set of Minnie Mouse scrunchies. I kept looking at them thinking they would be fun to make, and after making a knotty headband for our youngest’s Mandalorian birthday part a couple of months ago I decided the knotty style would be the easiest way to make DIY Minnie Mouse scrunchies.

Minnie Mouse Scrunchie With Cricut Maker
Years ago, I made Minnie Mouse ears for my daughter’s second birthday. (This was long before everyone made them on Etsy.) I still remember the hand cramps from cutting fabric for 20+ pairs of ears. So this time, I got smart. No more hand-cutting circles for me, now I use my Cricut Maker to do all of the cutting. A huge time and hand saver!

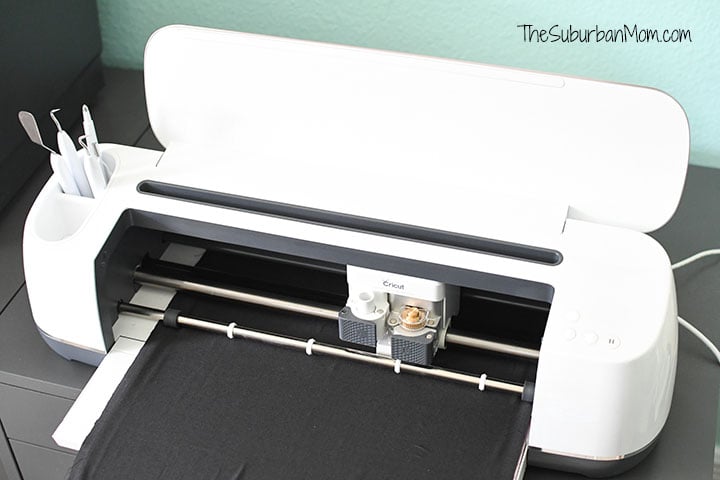
If you haven’t used a Cricut Maker to cut fabric, this is a fun project to try. With a rotary blade (which only works with the Cricut Maker, not a Cricut Explorer), the cuts are as clean and precise as you would expect with a Cricut. So much better than cutting those circle parts by hand.

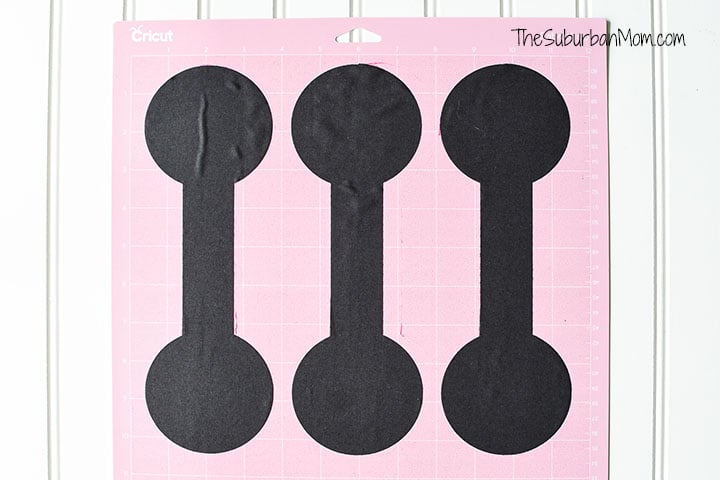
If you want to cut all of the parts for the scrunchie with your Cricut Maker, you will need a 24-inch fabric mat. If you don’t have a long mat, you can use a 12-inch mat to cut out the ears and cut the long 3.5 x 21-inch strip by hand. But it was nice having Cricut do all of the work! Plus with a 24-inch mat, I was able to cut four ear shapes at once – enough for two scrunchies.
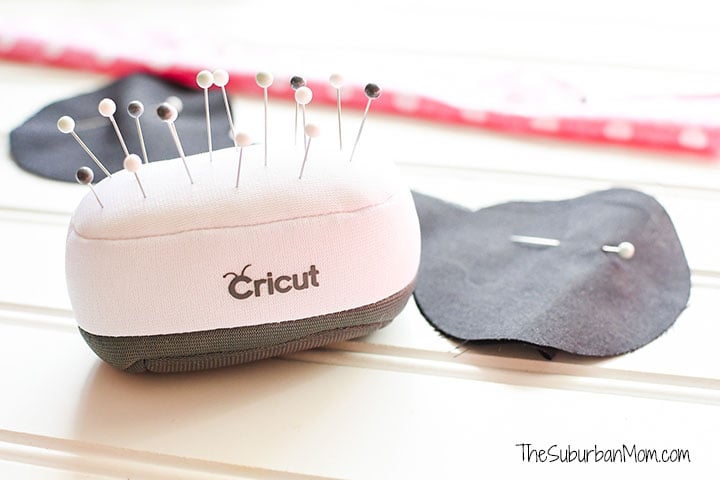
Cricut Sewing Tool Set
Let’s talk for a moment about the Cricut sewing tool kit. If you are a Cricut user and like to sew, you need this set. Not only do I love all of the matching tools, how cute is the pincushion that looks like a Cricut?!
DIY Minnie Mouse Scrunchie Pattern
I am very picky about my Minnie polka dots. After checking fabric at several stores I decided Walmart’s Waverly brand had the best dots. Of course, you can use any fabric, but if you are looking for dots that’s the way to go. (The line had other colors of dots too.) The smallest piece of fabric Walmart would sell me was 9 inches. With 9 inches of fabric, I was able to make four scrunchies. I bought 12-inches of black fabric, which was enough to make 6 sets of ears.
Materials:
- Fabric
- Elastic (8 inches each scrunchie)
- Thread
- Mouse ears pattern (below)
- Unsharpened pencil (optional)
- Safety pin
- Cricut Maker
- 24-inch fabric mat
- Rotary blade (replacement blade kit)
- Cricut sewing kit
- Mini Easy Press (optional)

Directions:
Download the Mickey Mouse scrunchie pattern below:
- If you plan to cut your 3.5 x 21-inch strip by hand, download the EARS ONLY pattern HERE.
- If you want to cut the 3.5 x 21-inch strip with your Cricut, download the EARS AND SCRUNCHIE pattern HERE.
Upload the pattern of your choice to Design Space. Choose “simple,” then save as a “cut only” image.
In Design Space, you will need to resize the ear pattern to 10 inches long (from ear to ear) and the rectangle is 3.5 x 21 inches. If you want to cut more ear patterns, duplicate as many patterns as you need. You need two ear patterns for each scrunchie. (You can make up to 6 ear patterns on a 24-inch mat, or three on a 12-inch mat). Hide the rectangle pattern for now, and click “make it.”
Before cutting any fabric, be sure to iron out any wrinkles. With pieces this small, I grab my Cricut EasyPress Mini for quick touch-ups.

Place fabric on your Cricut fabric mat (pink), insert the rotary blade and load the mat into Cricut Maker. Select the correct blend of fabric as the material, I used cotton. Click “cut” on the Cricut Maker.
Once you have all of the pieces cut out, you are ready to assemble the Minnie Mouse scrunchies. You will need two ear pieces and one 3.5 x 21-inch piece for each scrunchie.
*If you are making for little ones, you can make the strip narrower. I used a 2.5-inch-wide strip for my four-year-old with the same size ears.
To sew the Minnie Mouse ears, place two ear pieces right sides together and pin so they don’t shift. (Note, with the black it wasn’t as important to get rights sides together, but if you are using patterned fabric this is a must.) Sew all the way around the ears leaving a one-inch gap in the middle of the barbell between the two circles. This is for turning the ears right side out.

Use a pair of fabric scissors to trim along the seam on the circle portions of the ears. This will help prevent the ears from puckering when turned right side in. Snip close to the seam, but don’t cut through the seam.
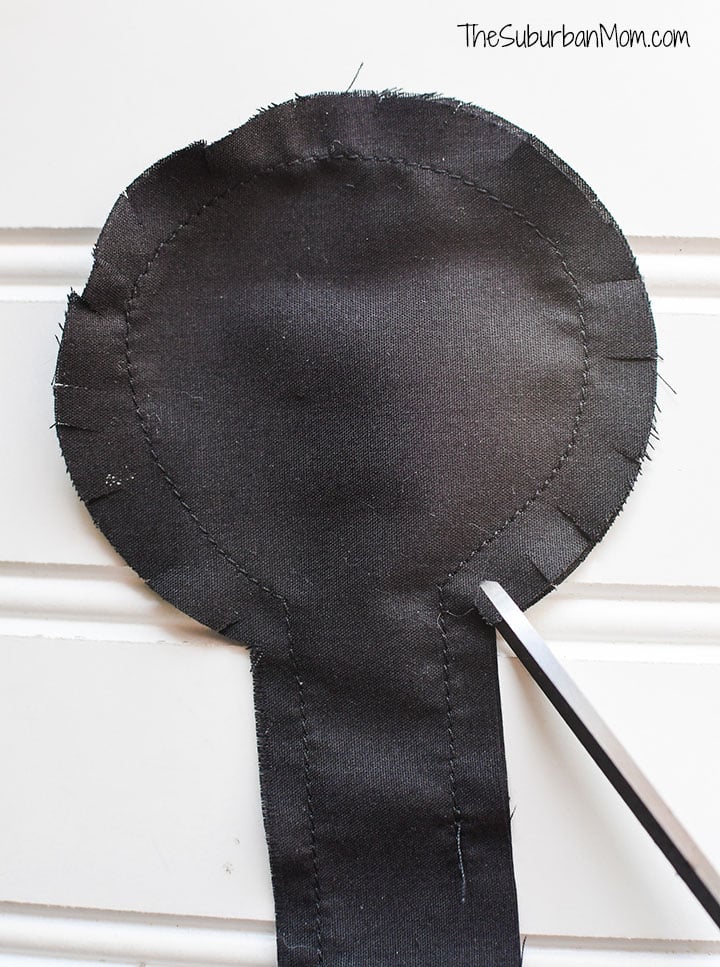
Use an unsharpened pencil (chopsticks work well too) to help turn the ears right side out. You can sew the small hole by hand or topstitch around the entire ear shape, but you can also leave it as is. This part will be tied tight to your scrunchie to hold it closed. I did not sew mine closed.
Fold the 3.5 x 21-inch strip in half, lengthwise, and pin to secure. Sew the two halves together creating a long tube. Use a safety pin on one end to help turn the tube right side out.

Feed an 8-inch piece of fabric through the tube. Overlap the elastic by about an inch and sew ends together.
Tuck one end of the tube into itself, about a half-inch. Slide the other end of the tube into that end. Topstitch across both ends and the elastic sealing the scrunchie closed.
Finally, take the pair of ears and tie it around the scrunchie with two knots and pull tight. I tied my ears over the seam where I closed the scrunchie to hide it.

The Minnie Mouse scrunchie looks great on a ponytail, bun or even your wrist. Who is ready for a trip to Disney now?!

How To Clean Your Cricut Mat
One thing about cutting fabric is that the mat gets unsticky very quickly. There will be lots of bits and string left behind on every cut. I was able to cut fabric for six Minnie Mouse scrunchies, but on the last cut, the mat was definitely not very sticky.
To clean your mat, place a squirt of mild liquid soap (I used hand soap) and water on your mat. Use your hands to gently rub soap all over your mat. The lint and string will ball up, throw any clumps in the trash. When the mat looks clean, rinse and leave to dry.
When dry replace the protective plastic film on the mat to store. Next time you need your mat it will be sticky and ready to use.