A fun project to do when the kids are home for summer, the paper plate greenhouse combines crafting fun with a STEM-based science project about seeds. Learn about seed germination and watch it happen through homemade greenhouses. The paper plate greenhouse is also a great project for Girl Scouts.
What started as a fun weekend project with a single greenhouse for each of my daughters eventually turned into my daughter’s fourth-grade science project. If you are looking to do this for a fun project, you can skip the section about making it a science project and proceed to the instructions about how to make a paper plate greenhouse.
Even preschoolers can enjoy this project because they get to decorate their greenhouse and can watch a little plant form inside their greenhouse.

Seed Germination STEM Science Project
For a science project, students can use a variety of materials to test which is best for seed germination (like we did). You could also experiment with various seeds to see how fast each germinates. You could even do a combination of both.
From Wikipedia
Germination is the process by which an organism grows from a seed or similar structure. The most common example of germination is the sprouting of a seedling from a seed of an angiosperm or gymnosperm.
In order to create a full science project, students should research the germination of their selected seeds to learn what factors are needed to germinate seeds. They should also make a hypothesis, track the progress and finally prepare a conclusion. My daughter presented her information on a traditional tri-fold poster board.

Paper Plate Greenhouse
Making your own paper plate greenhouse is fun. After the success of our greenhouses at home, I also had our Girl Scout Troop create paper plate greenhouses as part of the Junior Gardening badge. I presoaked the lima beans at home and the girls made the greenhouse during the meeting. Everyone had fun reporting back about their greenhouses at the following meetings.
Materials:
- Paper plates
- Plastic bags
- Yarn
- Lima beans
- Paper towels
- Cotton balls
- Paper
- Scissors
- Art supplies (optional)
Directions
Soak four lima beans per greenhouse overnight in a very wet paper towel. For our experiment, we set up two trials of each of the three materials, for a total of 24 lima beans.
Our experiment compared paper towels, cotton balls and copy paper as materials for seed germination. You can expand on this list with whatever materials you have on hand or just try one material to create one greenhouse.
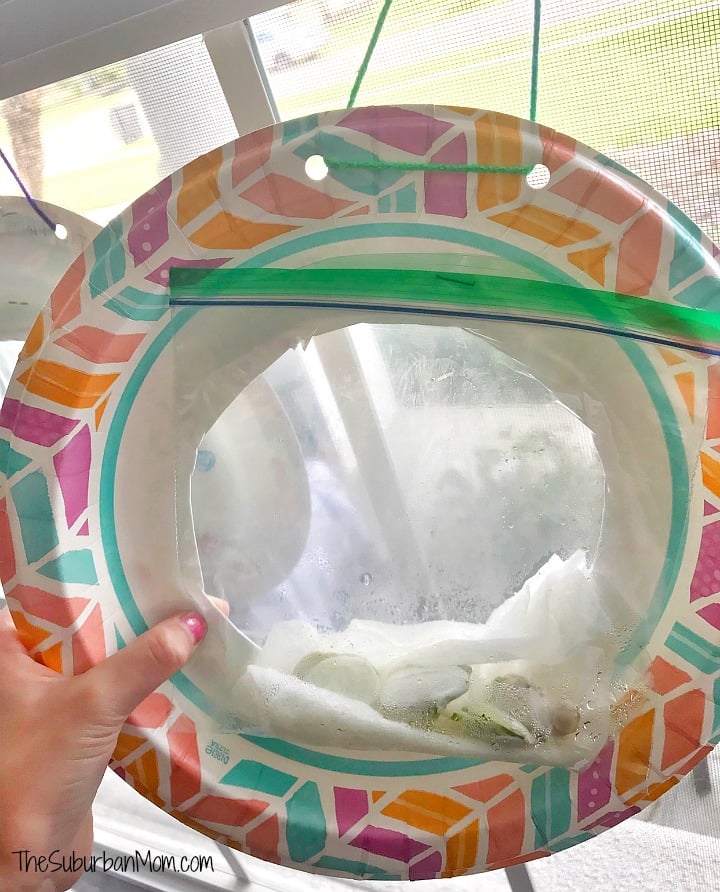
Place four (presoaked) lima beans in a plastic bag with your dampened material for each greenhouse experiment and seal the bag closed.
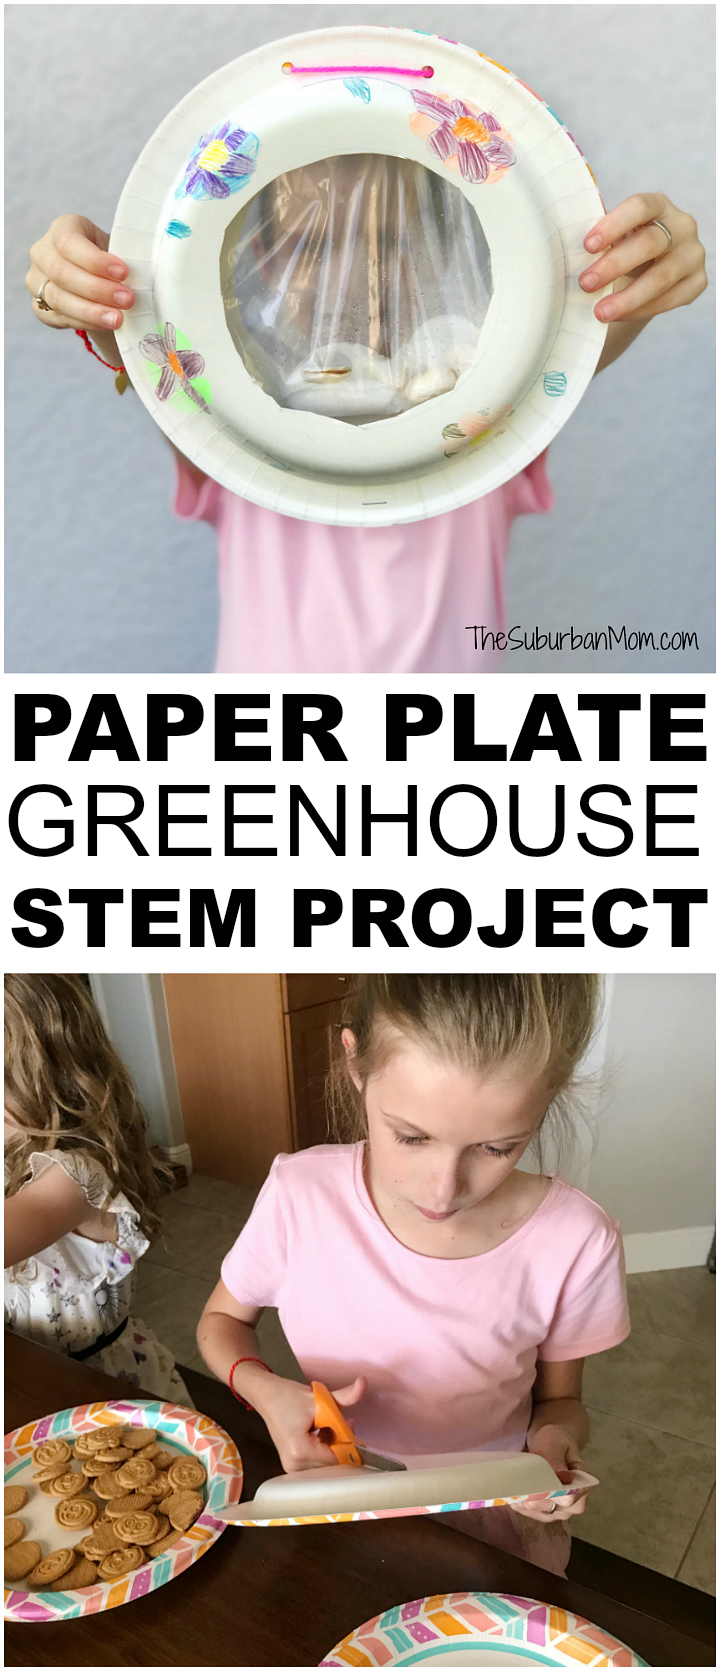
With a parent’s help, cut a circle in the middle of a paper plate for each greenhouse. You need two paper plates for each greenhouse. The size of your plate will determine your circle size. It should be large enough to serve as a window to your seeds, but you also want to leave a ring to decorate.
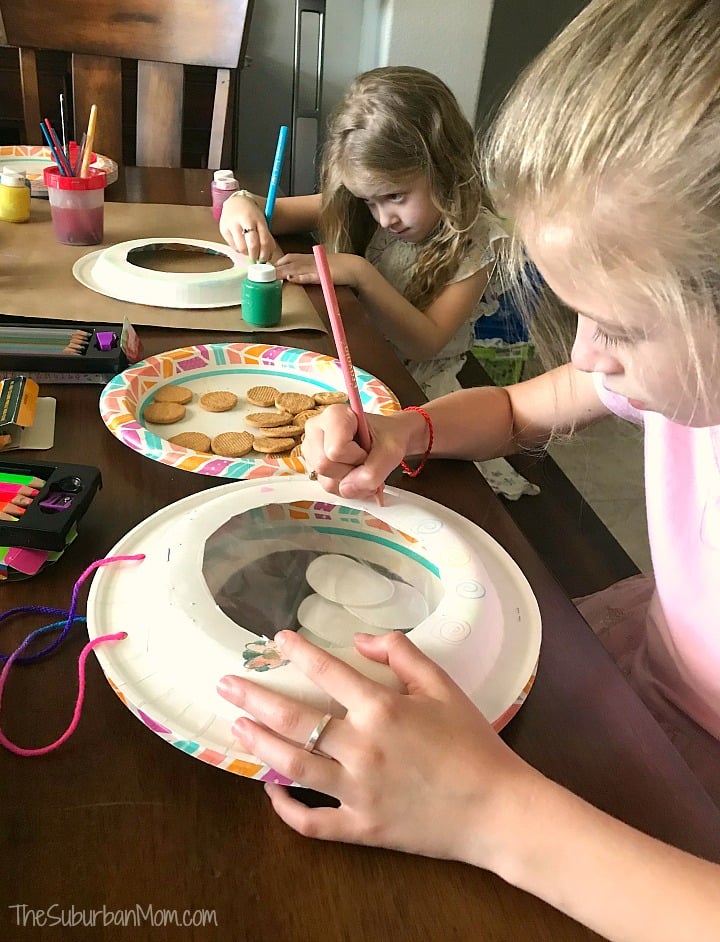
Decorate the outer ring of the paper plate on what would be the bottom of the plate as you please. Place two places together so they each curve outward creating hollow space between, and then punch two holes in the top of the rings. Feed a piece of yarn through both holes to attach the plates and form a loop. This allows you to hang the greenhouse in a window and easily check on the experiment from both sides.
Separate the two plates and staple the plastic bag to the inside of one ring. Staple the two rings together at the bottom. Leave the top held together by only the yarn, this way you can open them up to peek inside.
Be sure to label each greenhouse so you know what material is inside. Hang the paper plate greenhouses in a sunny window from the yarn using a piece of tape.
Check the greenhouses daily to check for progress. After a few days, the plants will begin to sprout. Some materials work better than others, but I will let you experiment to see which ones work best.

Our kids had a great time checking in on their little plants daily and watching them grow. Some of the plants even pushed through the zip on the plastic bag. After your lima beans have sprouted, they can be transferred to a small pot with soil to continue to watch the process. If they are left in the bags for too long, they will eventually begin to mold, which is what happened to our little plants.
Have a great time!
For more paper plate fun, check out our Paper Plate Dream Catchers.